First home buyer checklist Australia: from pre-approval to settlement
Buying your first home in Australia is one of the largest financial decisions you'll ever make, spread across six to twelve months and at least nine distinct stages, most of which you've never done before. It's not difficult, exactly. It's just unfamiliar. Every stage has its own paperwork, its own jargon, and its own ways of going wrong if you skip a step.
This checklist is built to be worked through in order. Each stage has a short explanation and a list of items to tick off. You can read it through online, or print it (or save it as a PDF) and tick it off by hand as you go. By the time you reach settlement day, every box should be checked. If a box is empty, that's the thing you need to deal with before you sign.
Stage 1: Get your finances sorted
Don't look at a single property until this stage is complete. House-hunting before finance is approved leads to disappointment, broken hearts, and (most commonly) wasted time. Lenders' assessment of how much you can borrow is almost always lower than what online calculators suggest.
- Work out your deposit. Most lenders prefer 20% to avoid Lenders Mortgage Insurance (LMI). First home buyers can buy with as little as 5% under the First Home Guarantee.
- Get home loan pre-approval from a lender or mortgage broker. Pre-approval is typically valid for 3 to 6 months and gives you a realistic upper limit.
- Check eligibility for the First Home Owner Grant (FHOG). Amounts and rules vary by state: typically $10,000 to $30,000 for newly built or substantially renovated homes only.
- Check eligibility for the First Home Guarantee (federal scheme). If eligible, you can buy with a 5% deposit without paying LMI.
- Calculate your stamp duty using your state's online calculator. First home buyers often qualify for full or partial concessions up to a price threshold.
- Budget the hidden costs: conveyancing ($800 to $2,500), building and pest inspection ($400 to $700), loan establishment fees, mortgage insurance (if applicable), removalist, building insurance, council and water rate adjustments.
- Set a maximum purchase price that includes all of the above, not just the deposit and loan amount.
The most common mistake at this stage is calculating the deposit and ignoring the rest. Stamp duty alone can be $20,000 to $40,000 unless you qualify for a concession. Settlement costs commonly add another $3,000 to $6,000. Build your budget around the total, not the headline.
Stage 2: Define what you're actually looking for
A vague search wastes weekends. Before you visit a single open home, write down the non-negotiables, the nice-to-haves, and the absolute deal-breakers. Look back at this list whenever you start emotionally falling for a house that doesn't fit it.
- List your non-negotiables: minimum bedrooms, minimum bathrooms, parking, outdoor space, distance from work, school zone if relevant.
- Pick 3 to 5 suburbs that match your budget and lifestyle. Use median price data from realestate.com.au, Domain, or CoreLogic.
- Set alerts on the major listing sites so new properties matching your criteria reach your inbox the day they're listed.
- Identify your absolute deal-breakers: flood zones, busy roads, properties on land with mining or contamination history, north-east-facing only, no apartments below the third floor, no slab-on-ground homes, whatever applies.
Stage 3: Hit the open homes
Now you're looking. Plan a sensible Saturday route (no more than 4 to 6 open homes in a day) and use each visit to confirm the listing matches reality.
- Visit at multiple times of day. A house quiet on a Saturday morning may be on a busy commuter route at 7am.
- Look at the neighbouring properties, not just the listed one. Neighbours and street presentation are part of what you're buying.
- Take photos and notes. After three open homes, the details blur. Photograph each room, the exterior, the street, and anything that raised a flag.
- Look for visible warning signs: cracks in external walls, sagging ceilings, water staining, fresh paint over patched areas, mismatched flooring, sloping floors, mould around wet areas.
- Ask the agent the standard questions: why is the vendor selling, how long has it been on the market, what's the expected price range, have they had any offers, when does the vendor want to settle.
- Keep a shortlist tracker. Score each property against your non-negotiables list. A spreadsheet beats memory after week three.
What you see at an open home is the surface. Visible issues are usually less expensive than the ones a building inspector finds later. Don't reject a property over cosmetic items, and don't accept one because it presents well.
Stage 4: Engage a conveyancer or solicitor before you make an offer
The biggest mistake first home buyers make at this stage is leaving the conveyancer until after the offer is accepted. By then, you're committed and rushed. Engage your conveyancer when you're seriously considering a property, ideally before you make an offer, so they can review the contract of sale calmly.
- Find your own conveyancer or solicitor. Do not use the one the agent recommends. The agent works for the vendor.
- Get a quote in writing. Conveyancing typically costs $800 to $2,500 depending on state and property complexity.
- Send them the contract of sale and (in Victoria) the Section 32 vendor statement for review. Don't sign anything before they've read it.
- Confirm what searches they'll run: title, council, water, planning, drainage, building, environmental.
A good conveyancer will identify issues with the contract before you offer: unusual special conditions, vendor-imposed restrictions on building and pest, settlement timelines that won't work for your finance, easements and covenants that could limit future renovations.
Stage 5: Make an offer (private treaty) or prepare to bid (auction)
The mechanics of offer-making depend on whether the property is being sold by private treaty or at auction. The two routes are very different.
Private treaty
- Decide your maximum price. This is the number you will not exceed regardless of what the agent tells you. Write it down before you start negotiating.
- Make your offer subject to standard conditions where possible: building and pest inspection, finance approval, and (in NSW) sale of your current property if relevant.
- Submit the offer in writing through the agent. Verbal offers are not binding and can be misrepresented.
- Know your state's cooling-off period: Victoria 3 business days on private sales, NSW 5 business days after exchange, Queensland 5 business days, South Australia 2 business days, Western Australia no statutory cooling-off (rely on contract conditions).
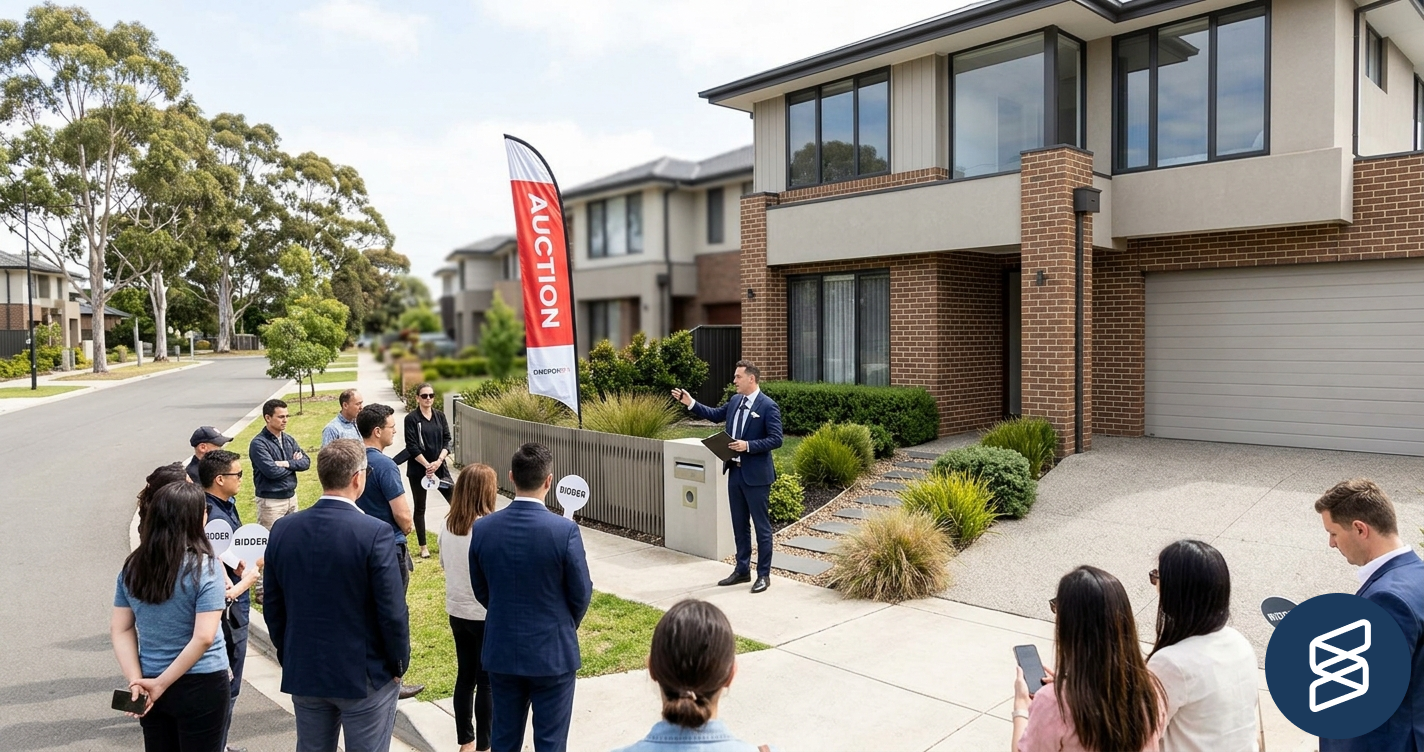
Auction
Auction purchases are unconditional. There is no cooling-off, no building and pest condition, and no finance subject-to. If you bid and win, you are bound. The inspection must happen before auction day. We've covered this in detail in building inspection before auction in Australia.
- Register to bid before auction day. Bring identification.
- Set your bid ceiling in writing the night before. Tell your partner, a friend, or your conveyancer. Commit to walking away if it goes above.
- Bring a 10% deposit (bank cheque, deposit bond, or transfer mechanism agreed with the agent).
- Have unconditional finance approval, not just pre-approval, before bidding.
Stage 6: Get a building and pest inspection
This is the single most consequential step in the entire process. Skipping it to save $500 has cost first home buyers tens of thousands of dollars more times than anyone can count. Every property you seriously commit to should have an independent licensed inspection.
- Book a licensed building and pest inspector. Typical cost is $400 to $700, sometimes more for larger or rural properties.
- For auctions, the inspection happens before auction day. For private treaty with a B&P condition, it happens within the condition window. In NSW, ideally before exchange.
- Use an inspector independent of the agent and vendor. Look for membership of a professional body (MBA, HIA, AIBI) and current professional indemnity insurance.
- Walk the property with the inspector if your state allows it. You'll see what they see and can ask in real time.
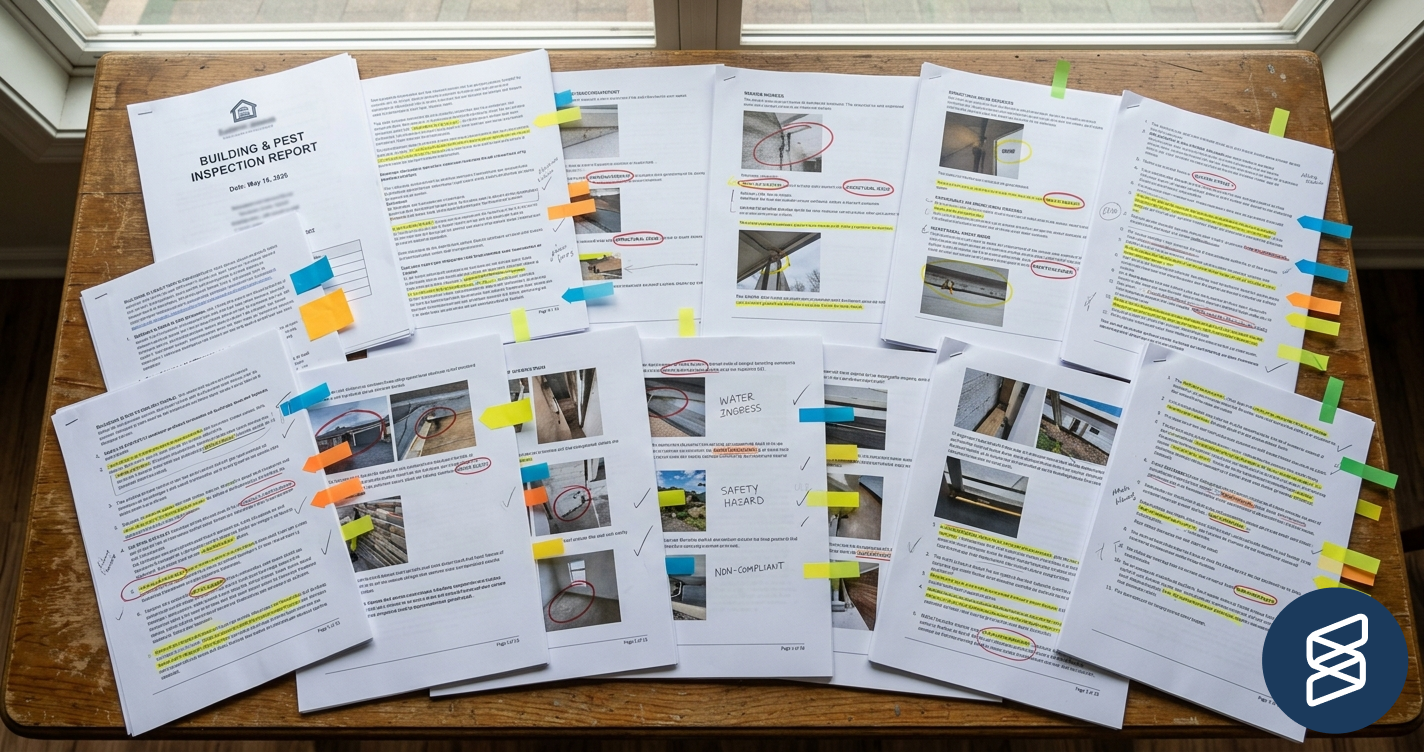
- Read the full report carefully, particularly the scope and limitations section. Identify major defects and items flagged for further investigation.
- If the inspector recommends specialist follow-up (engineer, plumber, pest controller), commission it before the contract condition deadline, not after settlement.
For an end-to-end overview of what a pre-purchase inspection involves, see our pre-purchase building inspection guide.
Stage 7: Decide what to do with the report
A typical report has anywhere from 5 findings (new build) to 40+ (heritage home). The number isn't the signal. Severity, action timing, and pattern are. We've covered this in how many defects is too many in a building inspection.
- Sort the report by severity. Filter to critical and major findings flagged for action before settlement.
- For each surviving item, get a written quote from a licensed trade.
- Decide which of three outcomes you want: vendor rectifies before settlement, vendor reduces the price by the cost of repairs, or vendor provides a credit at settlement.
- Send everything to your conveyancer. They draft the formal request to the vendor's solicitor. How to negotiate after a building inspection covers the full process.
- If the defects are systemic (structural movement throughout, widespread termite damage, illegal work that can't be legalised), terminate under the building and pest condition if your contract allows it. Walking away from the wrong property is the condition doing its job.
Stage 8: Exchange contracts and pay your deposit
Exchange is the legal commitment point. Once contracts are exchanged and the deposit paid, you are bound (subject to cooling-off where applicable).
- Your conveyancer reviews the final contract and confirms it's ready to sign.
- Sign the contract (both buyer and vendor sign; the contract is "exchanged" when both signed copies are swapped through the conveyancers).
- Pay the deposit, typically 10% of the purchase price, into the agent's or conveyancer's trust account.
- If you're in cooling-off and need to back out, do it through your conveyancer in writing within the cooling-off window. Penalties may apply (typically 0.25% of purchase price in NSW; varies by state).
- Note the settlement date. Standard settlement is 30 to 90 days, depending on contract and state.
Stage 9: Between exchange and settlement
Most buyers underestimate how much there is to do in this window. Time it badly and you'll arrive at settlement day with unconnected utilities, no insurance, and no removalist booked.
- Convert your pre-approval into final unconditional finance approval. Your lender will require valuation and final documentation.
- Arrange building insurance, effective from the date your contract states (in NSW typically from exchange; in Queensland from settlement). Your conveyancer will confirm the correct date.
- Book a removalist. Quality movers get booked 4 to 6 weeks in advance during peak periods.
- Arrange utility connections at the new address, effective settlement date: electricity, gas, water, internet.
- Notify your bank, employer, Medicare, Centrelink, the ATO, electoral roll, and other essential contacts of your new address.
- Redirect your mail through Australia Post for the first 3 to 6 months.
Stage 10: The pre-settlement inspection
In the days before settlement you have the right to inspect the property one last time. This isn't a building inspection. It's a quick walkthrough to confirm the property is in substantially the same condition as when you signed the contract, all agreed repairs have been done, and the inclusions are still there. We've covered this in detail in what to check in a pre-settlement inspection.
- Book the pre-settlement inspection through your conveyancer or the agent, ideally the day before settlement.
- Bring your contract of sale (inclusions list), your building inspection report, and your phone.
- Walk through every room. Confirm appliances are present, everything works, no new damage has appeared, and any agreed repairs are complete.
- Photograph any issues with timestamps. Call your conveyancer immediately if something is wrong, not the agent.
Stage 11: Settlement day
The final stage. Funds are transferred, title is registered, and the keys are yours. Most settlements happen electronically through PEXA, with conveyancers on both sides managing the process. You don't usually need to be present.
- Confirm with your conveyancer the morning of settlement that funds are ready and the transaction is on schedule.
- Once settlement is confirmed by your conveyancer, collect the keys from the agent.
- Change the locks. The previous owners and their friends, family, cleaners, gardeners, and tradies have all had keys. Replace them.
- Check that all utilities are connected and working: electricity, gas, water, internet, smoke alarms.
- Take meter readings (electricity, gas, water) on the day you move in, and photograph them. Useful for billing disputes later.
- Confirm your conveyancer has lodged the transfer of title with the relevant state titles office.
Common first home buyer mistakes to avoid
The expensive mistakes are predictable. Almost every story you'll hear about a buyer who got burned traces back to one of these.
Skipping the building inspection to save the inspection fee. The savings are wiped out by the first undisclosed defect. Even on a property that "looks fine," structural issues, active termites, and non-compliant work hide where amateur eyes can't see them.
Using the agent's recommended conveyancer. The agent works for the vendor. Their preferred conveyancer may also work for the vendor in other transactions. Pick your own.
Underestimating the total cost. Stamp duty, conveyancing, building inspection, building insurance, removalist, mortgage establishment fees, and utility connections together typically add 4% to 7% on top of the purchase price. Plan for the total, not the deposit.
Getting emotionally attached to the wrong house. When you've fallen in love with a property, your willingness to overlook problems goes up and your willingness to walk away goes down. The list of non-negotiables exists specifically to push back against that.
Panicking on auction day and bidding above the pre-decided ceiling. The auctioneer's job is to drive the price up. Your job is to stop where you said you'd stop. If you've done the inspection and set the ceiling, hold it.
Signing the contract before legal review. "Sign now, get conveyancer later" is the most expensive shortcut in property. The contract often contains special conditions, restrictions, and unusual settlement terms that only a trained reader spots.
Print or save this checklist
This page is designed to be printed or saved as a PDF and worked through stage by stage. From most browsers, choose Print from the menu (or press Ctrl + P on Windows, Cmd + P on Mac) and select Save as PDF as the destination. Tick each box as you complete the step. If a box is still empty when you arrive at the next stage, that's the thing to fix first.
Where the building inspection sits in all of this
Of every box on this checklist, the building and pest inspection is the one that protects you from the biggest financial losses. It catches the structural and compliance issues a buyer can't see at an open home, and it gives you the leverage to negotiate or walk away before you're committed.
If you've just had your report come back and you're trying to work out what's actually serious and what isn't, Snagger breaks the report down in plain English. Every finding rated by severity, sorted by urgency, with major defects pulled to the top. See what that looks like on a real report.
The rest of the checklist is process. The inspection is the bit that decides whether the rest of the process is worth running.
Got your first inspection report and not sure what's serious?
Upload your Australian building or pest report and get every finding explained in plain English, sorted by severity, with major defects flagged. The report's information made usable in the time you actually have.
Upload your reportSnagger is a comprehension aid only. This article is general information and does not constitute professional building, legal, or financial advice. Always consult a licensed building inspector, conveyancer, or other qualified professional before making any purchasing decision.
More articles
Should I get a building inspection before buying at auction in Australia?
Auctions in Australia are unconditional. Here's why a pre-auction building inspection matters, how to arrange one, and what to do if it finds problems.
How many defects is too many in a building inspection?
Your building inspection report has 20 findings and you're wondering if it's a walk-away report. Here's how to sort signal from noise when the list is long.
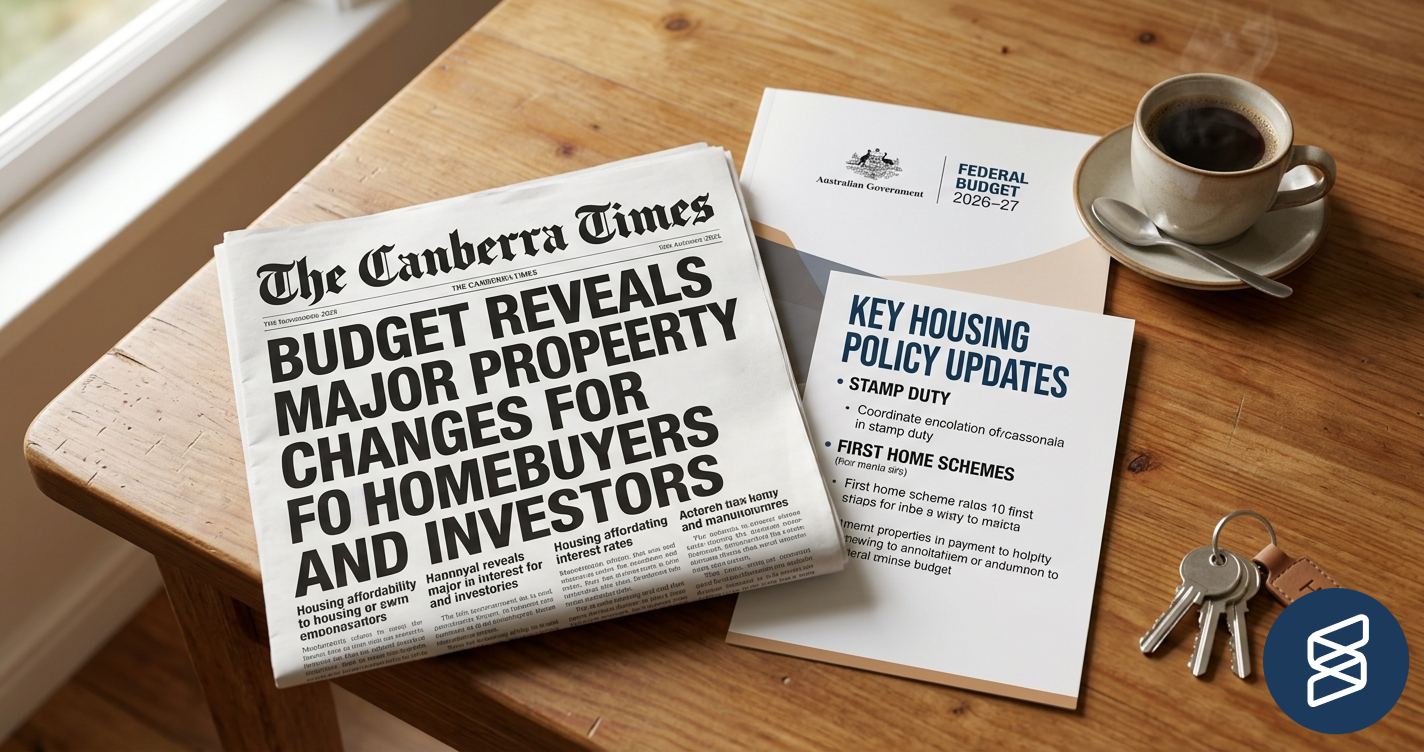
The 2026 budget and property: what the changes mean if you're buying a home in Australia
The 2026 Federal Budget reshaped negative gearing and CGT on established property. Here's what it means if you're buying a home, and why building inspections matter more now, not less.